Profile
Setup of Accounts and Access Rights Management for the platform.
User menu
My profile
When logging into TheViewPoint, click on the user icon in the upper right corner of the page and select My profile.
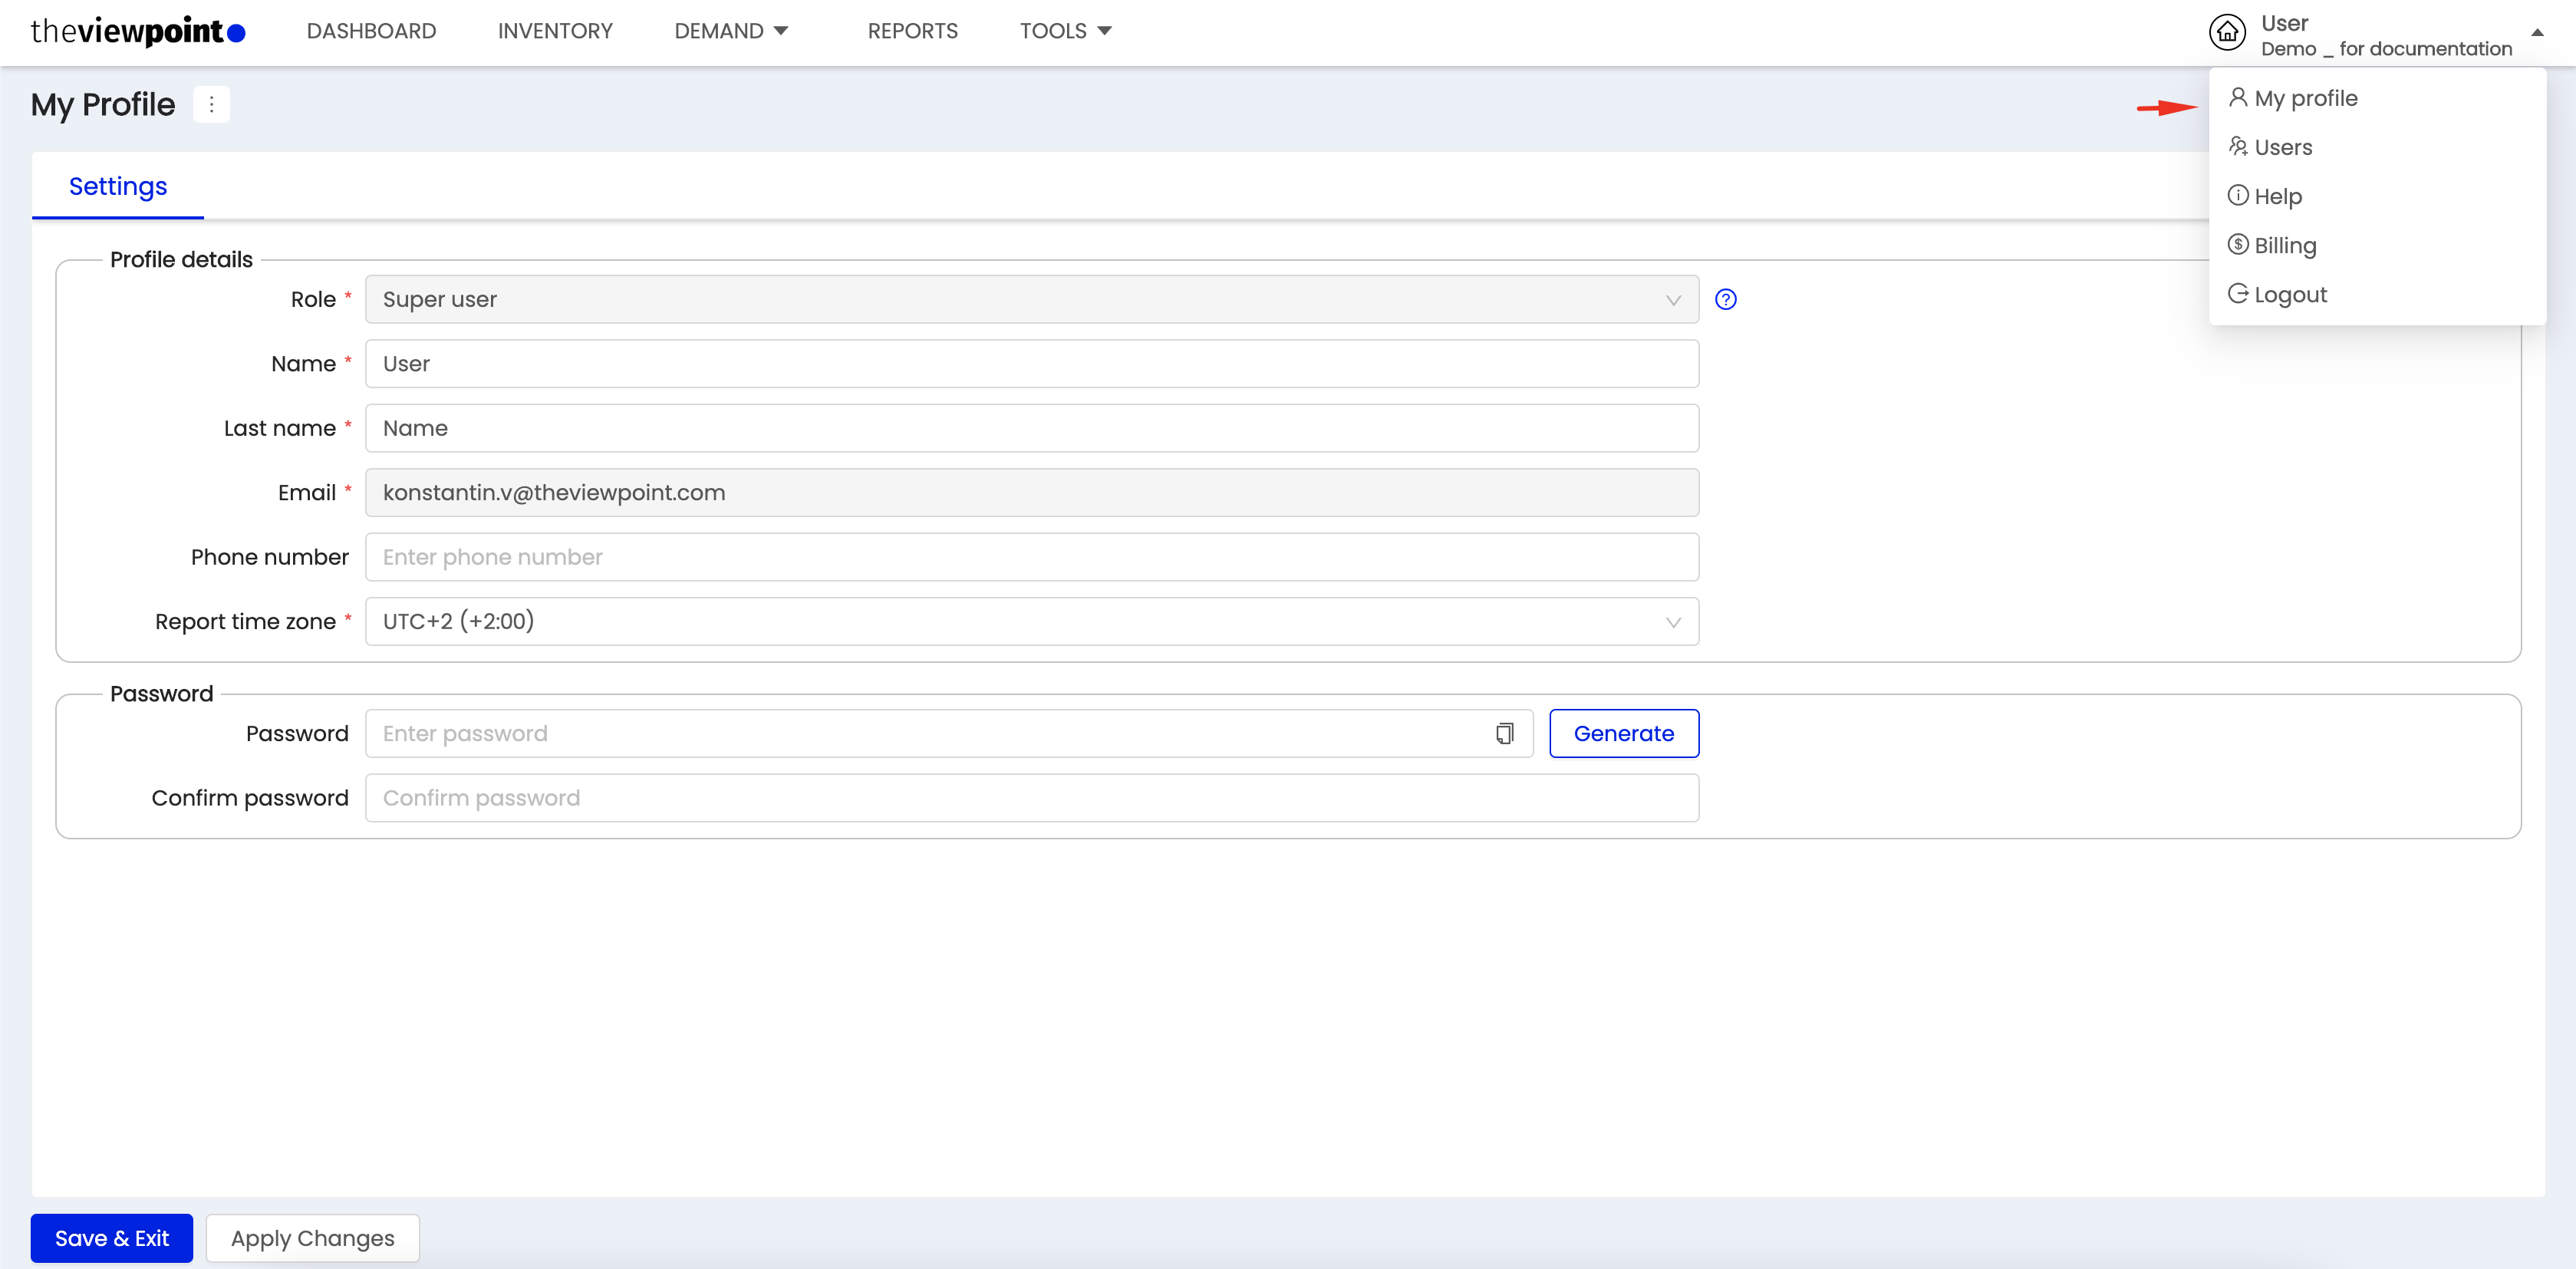
You will be taken to the settings of your TVP account, where you can:
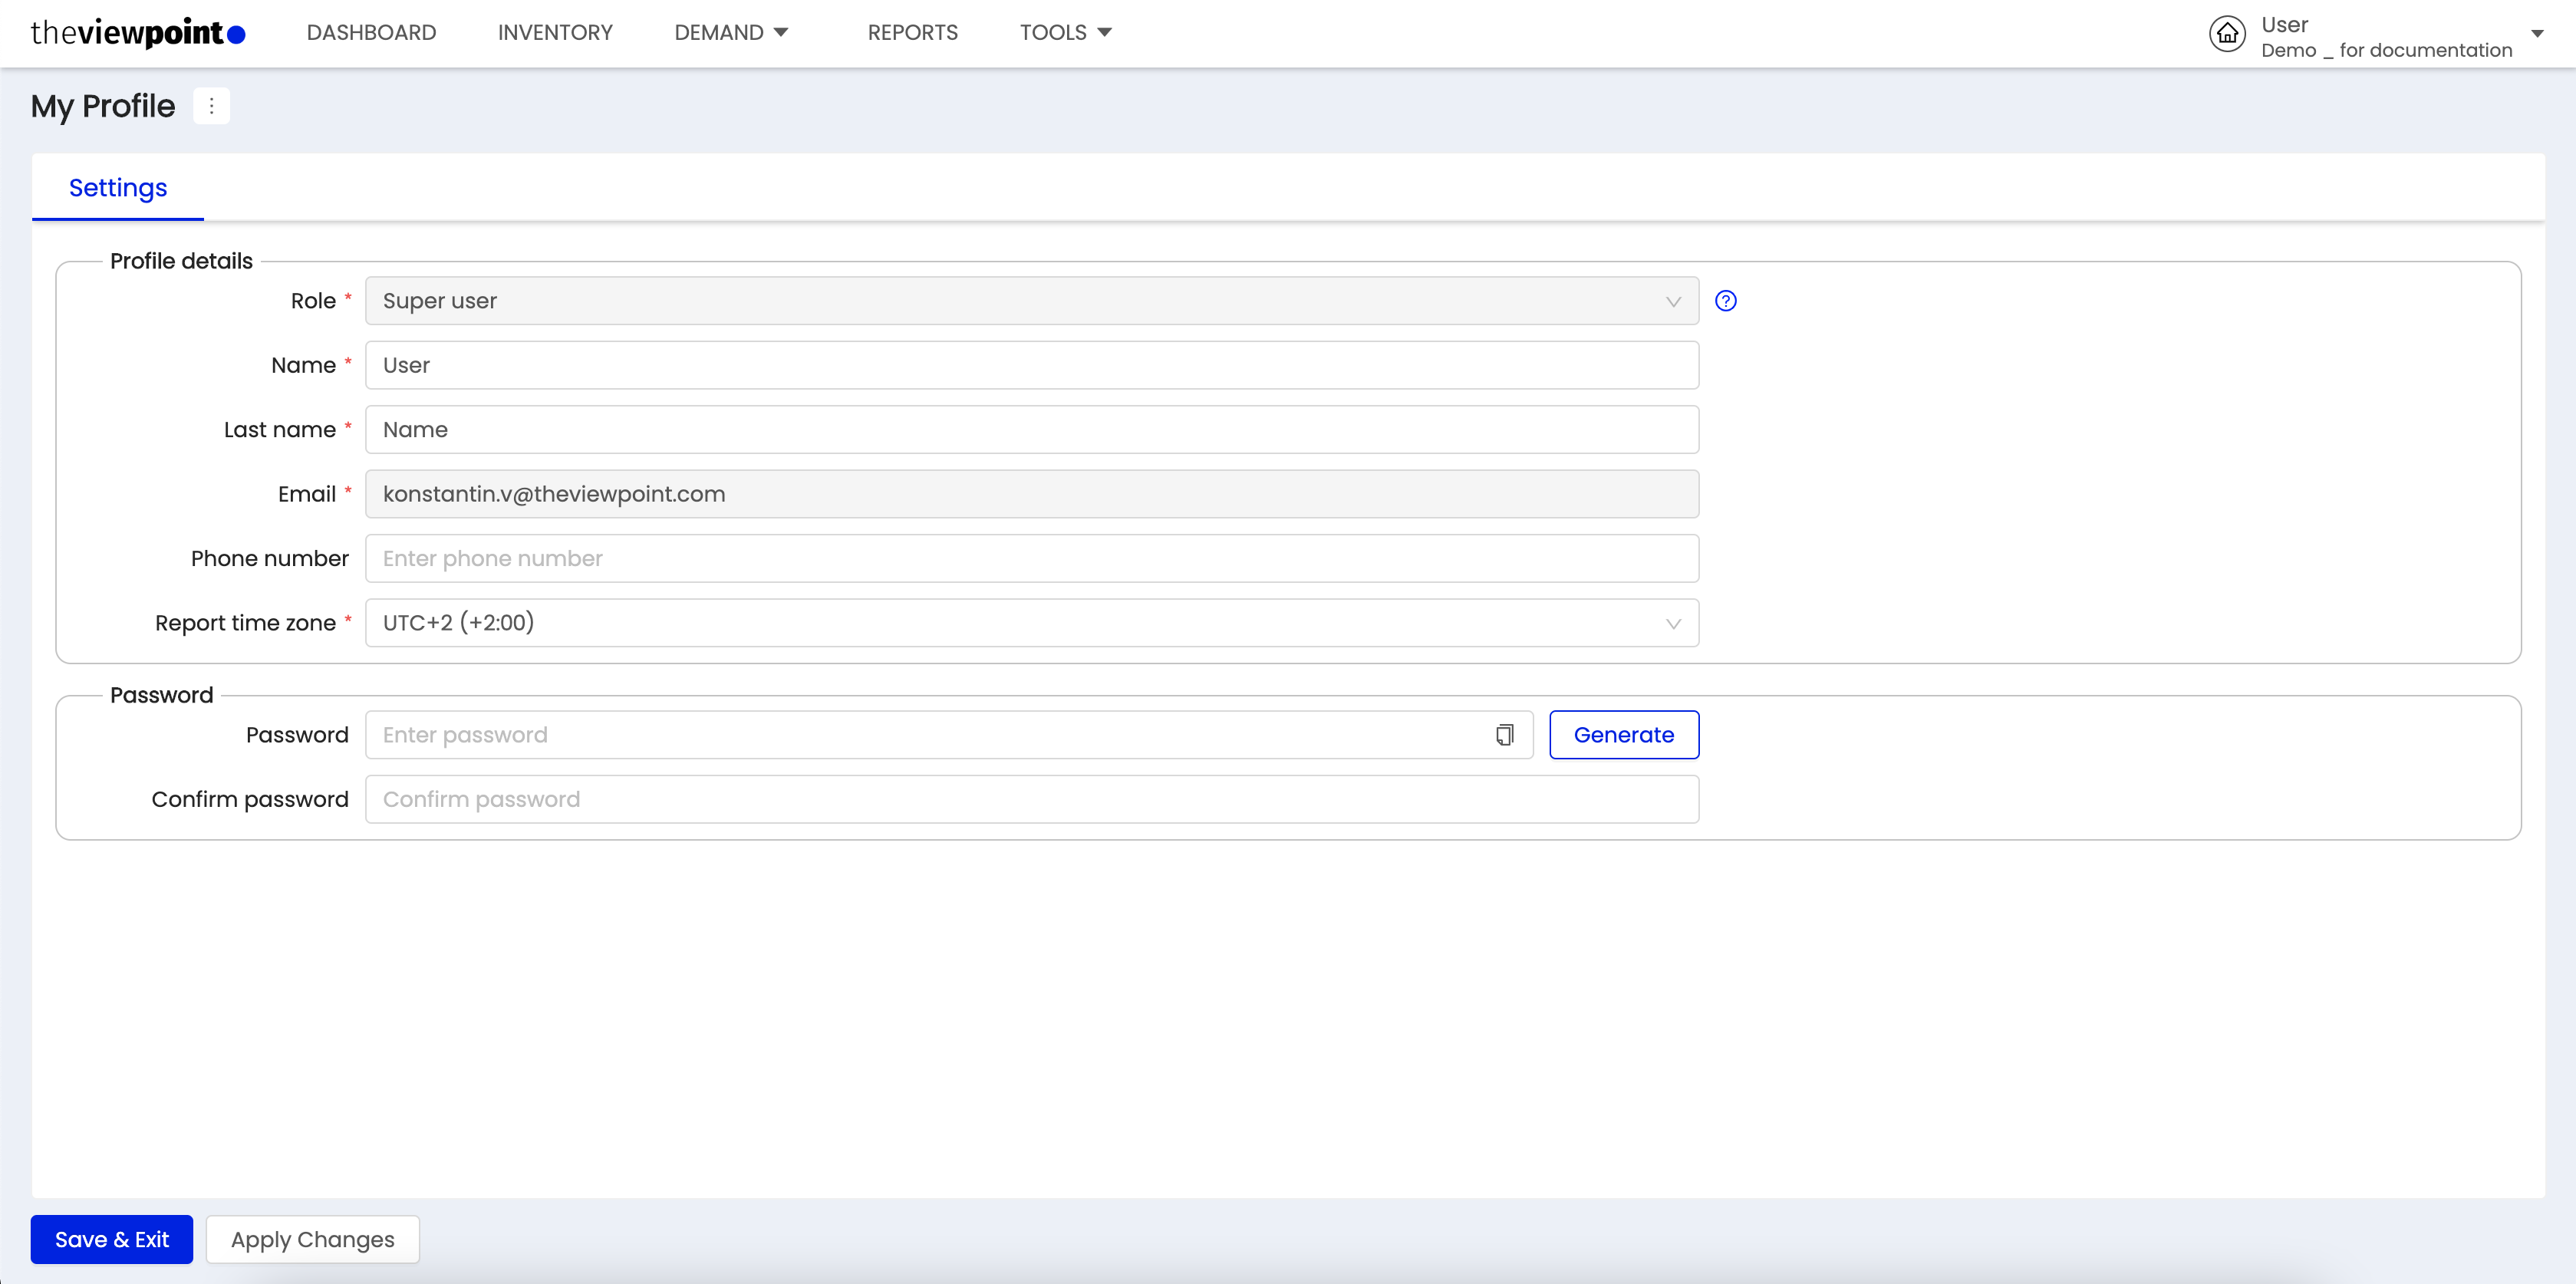
see your role and rights in the system;
edit your personal information such as first name, last name, mobile phone, and Report time zone;
change your password.
Security and password settings
Password requirements for manual entry:
You can enter only Latin characters both uppercase and lowercase;
Numerals;
Minimum 8 characters.
You can use the automatic password generation function by clicking on the Generate button. Be sure to save your password when using this function.
Report time zone settings
Tracking numbers on the platform will be displayed in this time zone and used by default in reports. You can choose whichever is convenient personally for you. This has no influence on actual delivery and tracking.
The data related to the time zone (for example, in reports, campaigns, charts with statistics) changes immediately after the change in the account settings.
Users
![]() This section of TheViewPoint system is only available to users with the “Super User” role.
This section of TheViewPoint system is only available to users with the “Super User” role.
Invite a new user
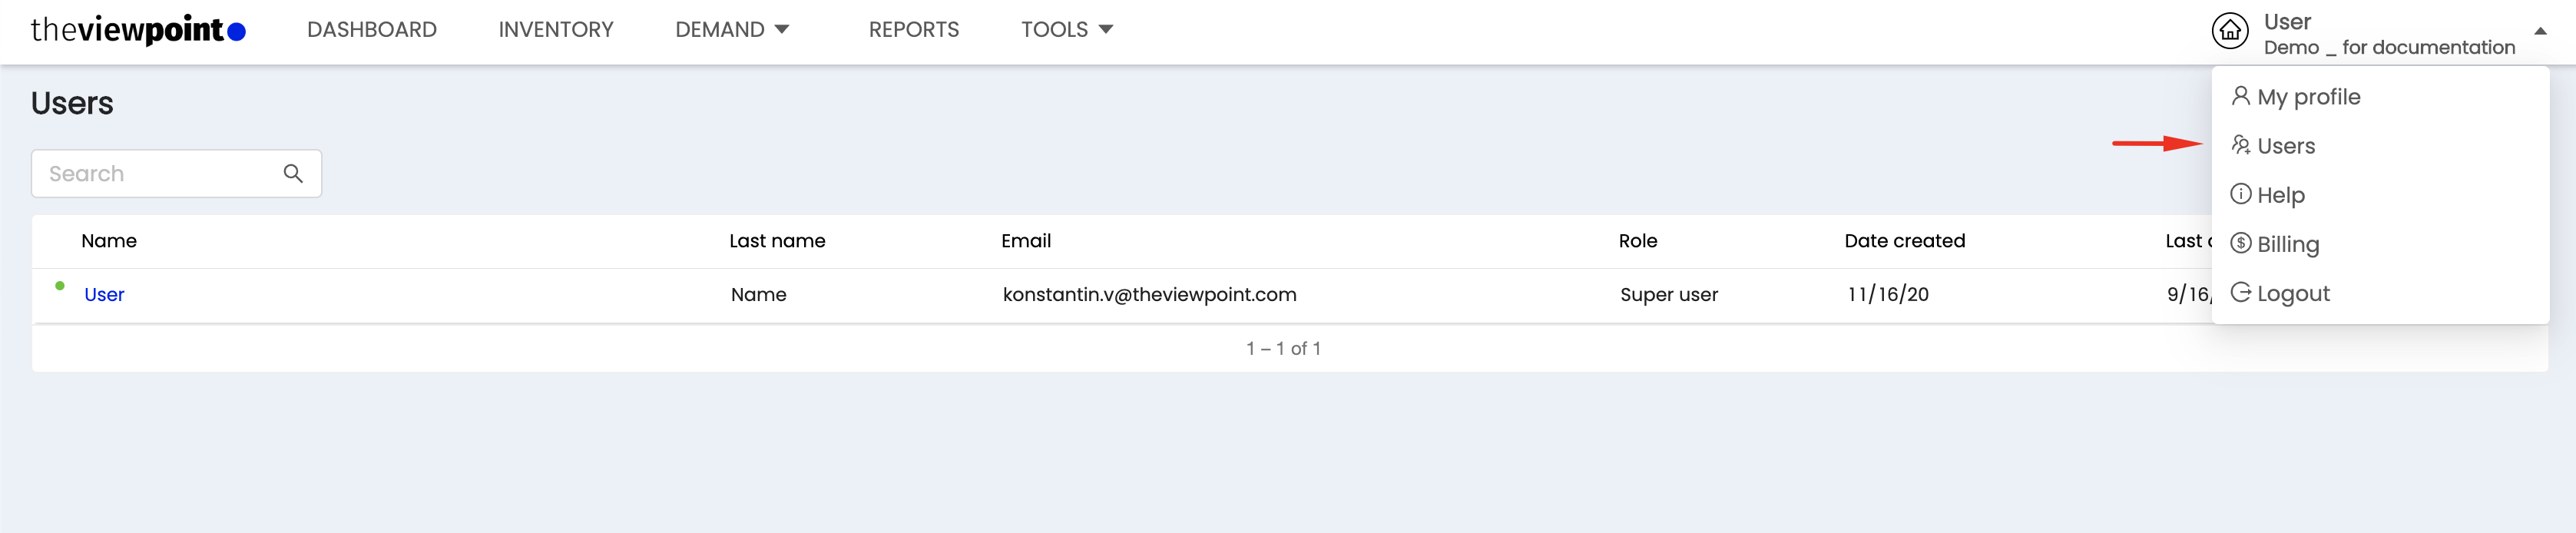
The system provides an option to give access to the account to colleagues. Click on the user icon in the upper right corner of the page and select “User”.
To invite to your account new user, click on the "New user" button.

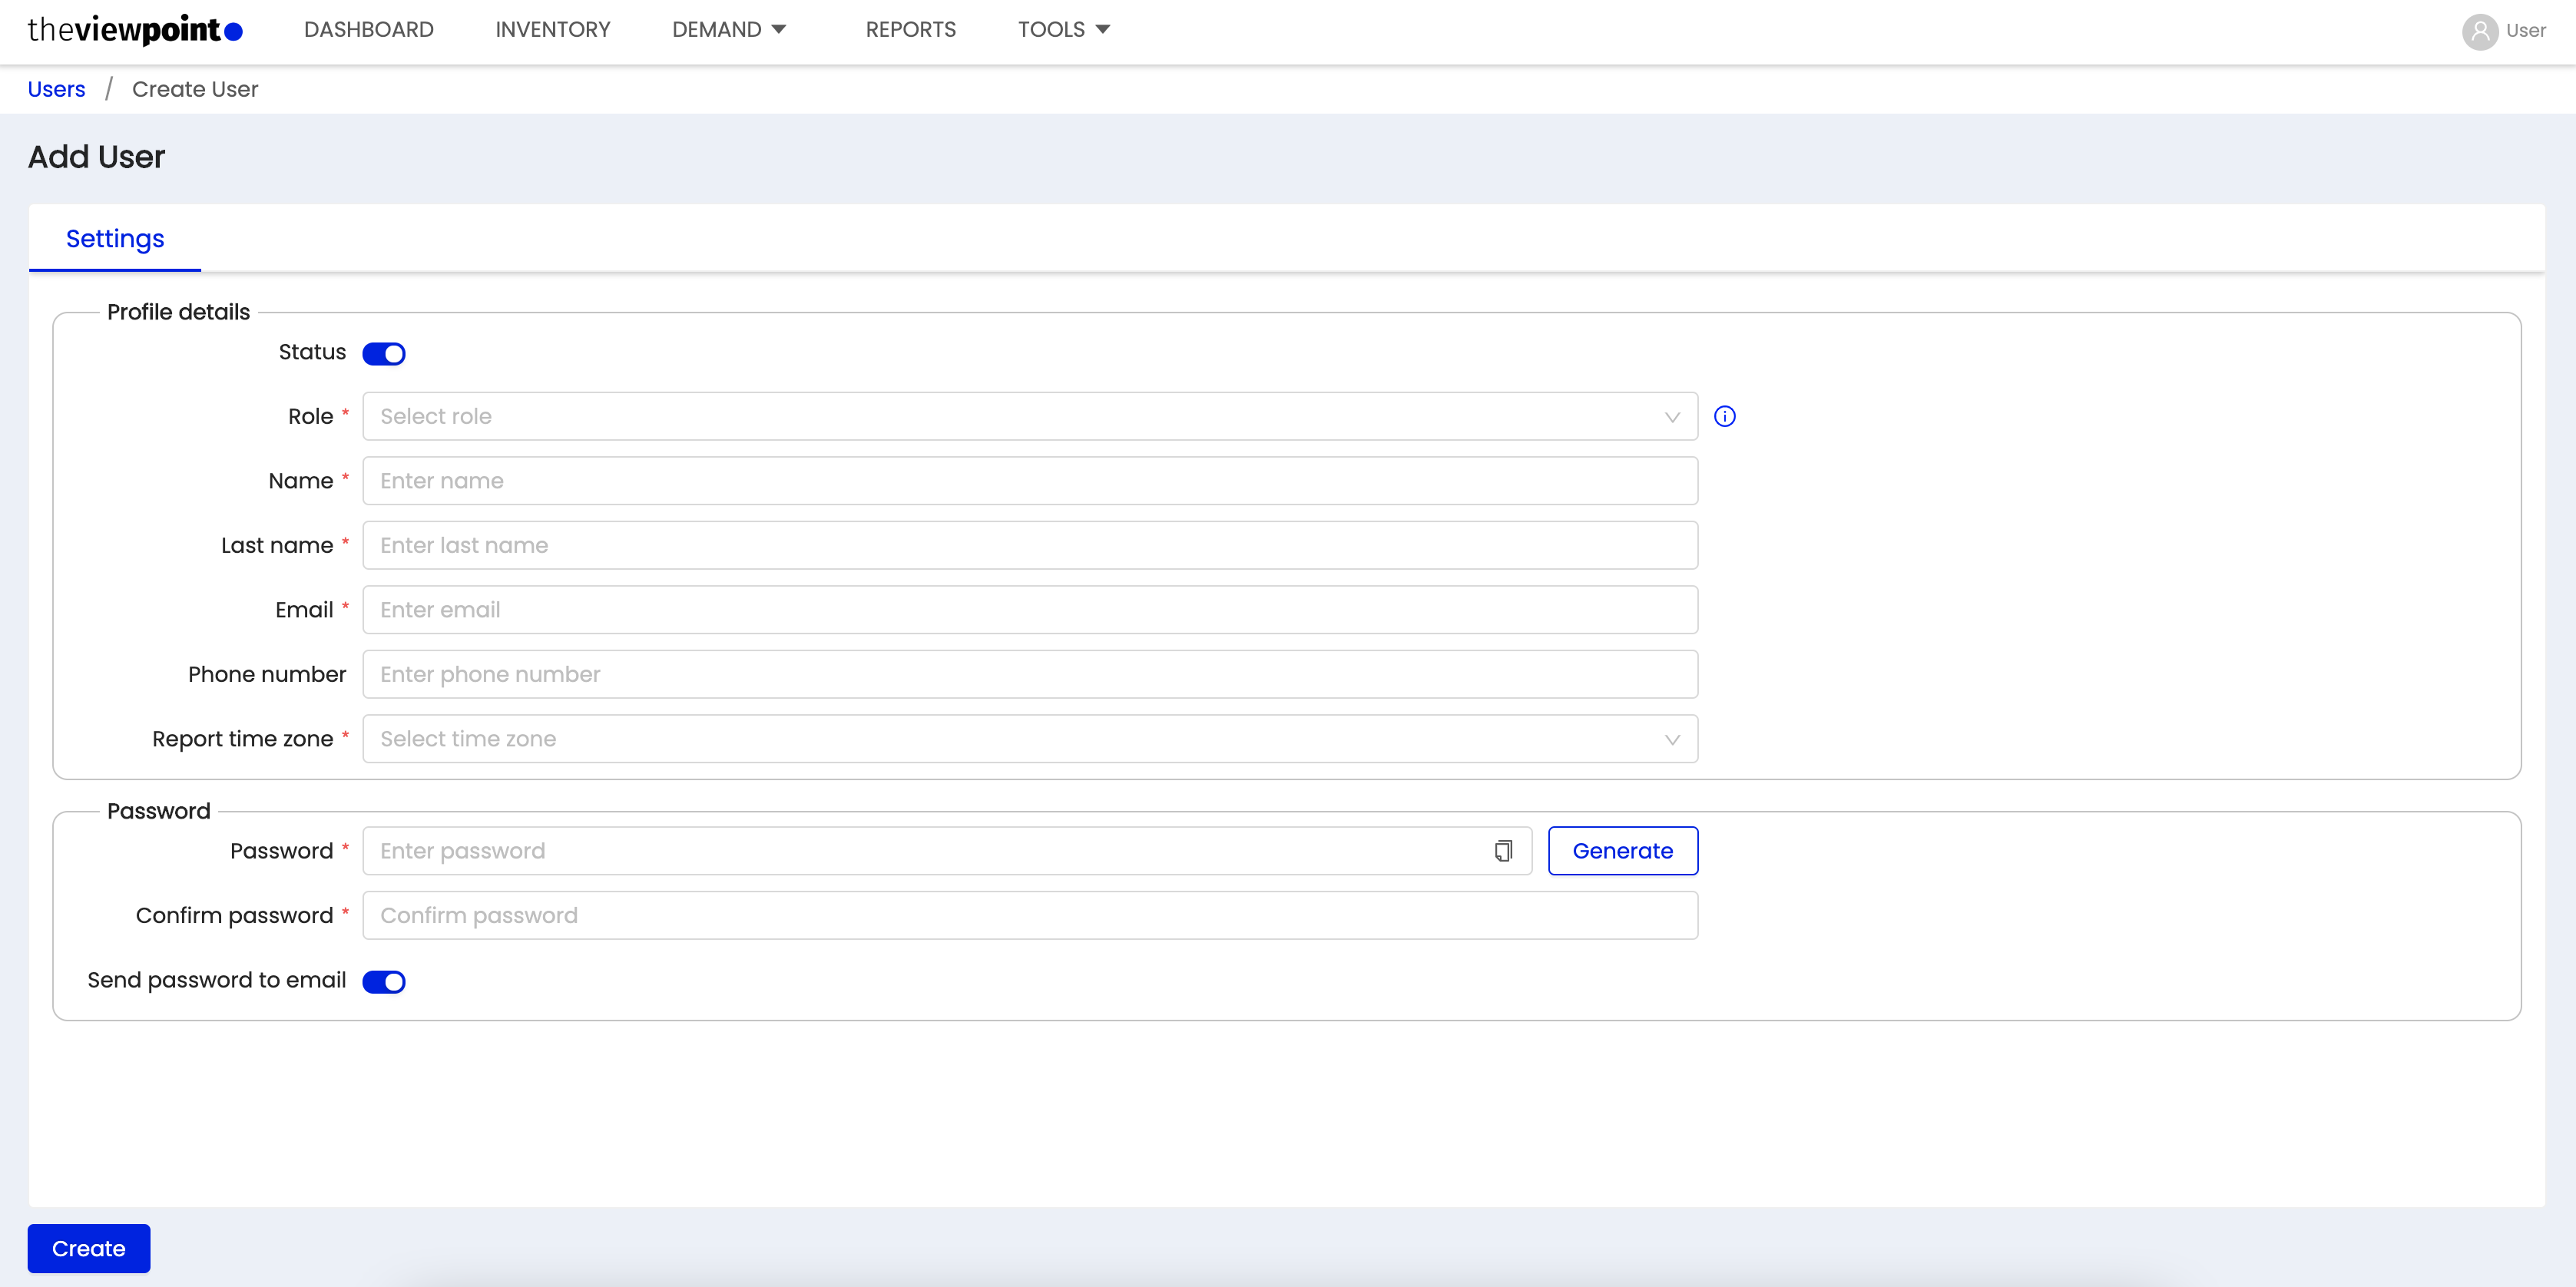
and fill in the following fields:
Status: enables/closing access to this account without deleting it;
Role: allows selecting a role that is required for a new user:
Roles:
Super user - full access.
Manager - full access, except tab users.
Viewer - only view, except users.
Analyst - only reporting.
Name: requires inputting the first name of the user;
Last name: requires inputting the Last name of the user;
Email is the Email of the user which will serve as a login for entering the system; reports and newsletters on system updates will be sent to this email;
Phone number is an optional field, refers to personal information, is used when there’s a need to contact a new user;
Report time zone selects the time zone of the new user, in which time zone s/he works or in which time zone s/he should receive a system operation report;
Password:
Password requirements for manual entry:
You can enter only Latin characters both uppercase and lowercase;
Numerals;
Minimum 8 characters.
You can use the automatic password generation function by clicking on the Generate button. Be sure to save your password when using this function.
Send password to email. If you enable this setting, a message with credentials will be sent to the email of the new user.
View and manage existing users of TheViewPoint system
We see a complete list of users of TheViewPoint account and their Roles in the system.
Options:
change the user's personal data, except for email;
temporarily block access to an account;
change the role of the user;
delete user.
![]() A user cannot delete him/herself or change his/her role.
A user cannot delete him/herself or change his/her role.
Regional Format Settings
The Regional Format tab allows you to customize various time and date settings according to your regional preferences. By following the steps outlined below, you can ensure that the platform displays dates and times accurately and in the format that suits you best.
Accessing the Regional Format Settings:
Log in to your account and navigate to the "My Profile" section.
Look for the "Regional format" tab and click on it to access the settings.
Setting the Default Time Zone:
Locate the "Default time zone" field and select your preferred time zone from the available options.
Choosing the Date Format:
Find the "Date format" select field and choose between the options of MM/DD/YYYY or DD/MM/YYYY.
The selected date format will affect how dates are displayed throughout the platform, including in Flights (Start & End date), Calendar (Date range), Queues for reports (Run time and Date range), and various tables and entities such as Reports and Activity logs.
Customizing the CSV Report Separator:
Locate the "CSV Report separator" select field and select either comma (,) or semicolon (;) as the desired separator.
This setting determines the format for downloading CSV reports from entity tables and other downloaded reporting files.
Setting the Time Format:
Find the "Time format" setting and choose between 12-hour and 24-hour options.
The selected time format will impact the time display in various areas, such as Overview charts, the Scheduling block, Reports (hour values), and the Activity log (Date & Time column).
Selecting the First Day of the Week:
Locate the "First day of the week" setting and choose either Sunday or Monday as the preferred starting day for calendars and report settings.
Please note that this setting does not affect the weekly allocation calendar on campaign settings.
Please note: When sending letters of reports, the system will consider the time and date settings of the user who initiated the action.
By customizing your Regional Format settings, you can ensure that the platform displays time and date information according to your regional preferences. If you have any further questions or encounter any issues, don't hesitate to contact our support team for assistance.
Password change
In case of changing the password for a user, you will receive an email with all the necessary information to re-login to the platform.

After changing the password, the system will end the current session and ask to re-login.
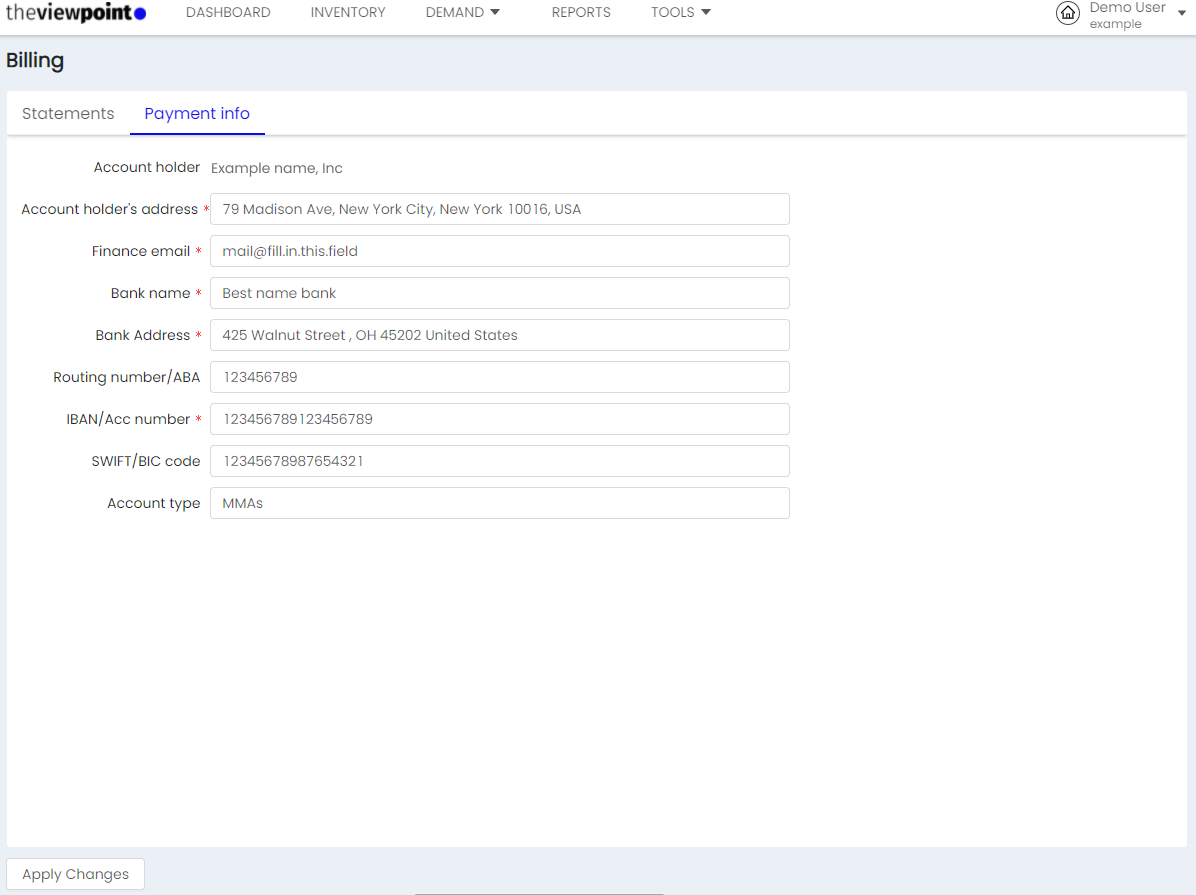
Billing
To go to the Billing section, open the profile menu and go to the Billing section.
By default, all data is displayed for the last available month in the Statements tab.
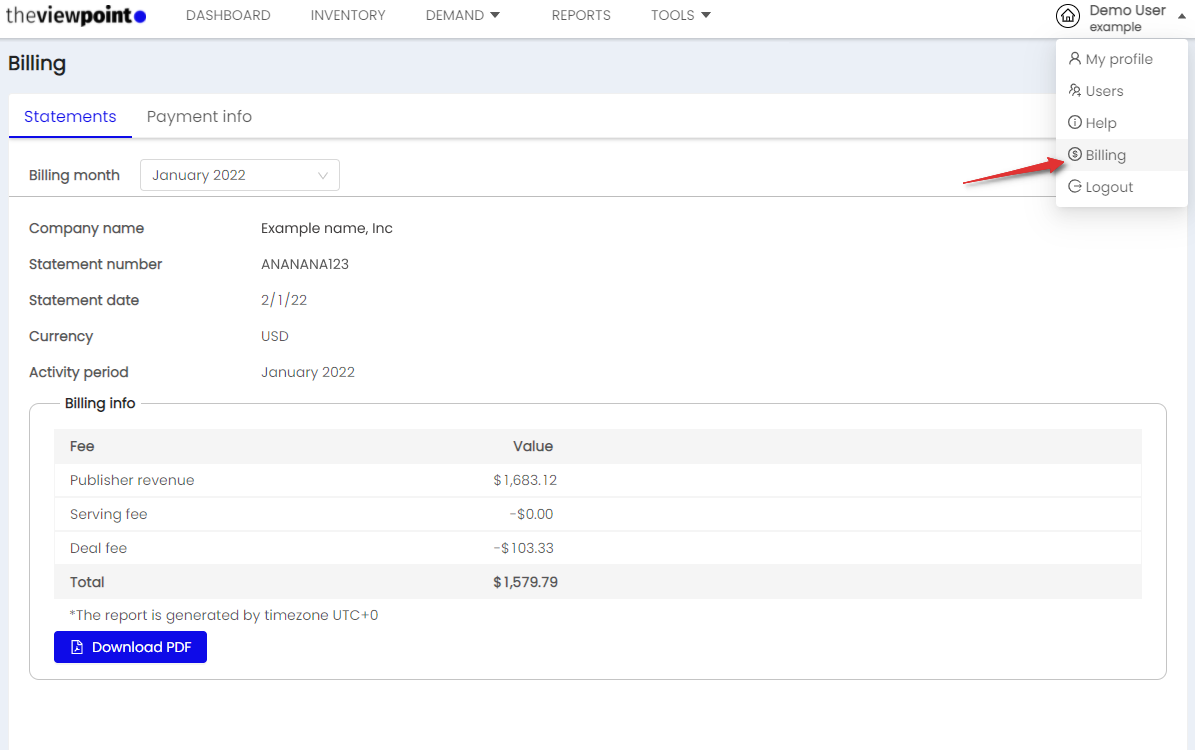
If you need data for a different period, select the required month in the item "Billing month".
Information for the month appears on the 2nd day of the month following it.
The information is available for download in PDF format. Final downloaded file name will be: Accountname_Billing_Month_Year.pdf (replaced with the required values)
On the Payment info tab, all relevant banking information is entered. These fields are always editable.