
Reports
Setup of reporting and functionality. Information about available dimensions and metrics.
General description
Use Reports to view detailed statistics on supply and demand.
The Reports section is in the top bar.
When accessing the Reports section, 3 tabs are displayed:
Tab | Description |
|---|---|
General | The reporting main page, where you can create a new report or run a report using an already prepared report template. |
Queue | A queue of reports that have a too large size to be viewed in the system. |
Preset | A list of pre-defined sets of settings for generating a report, which can be run or configured as scheduled reports. |
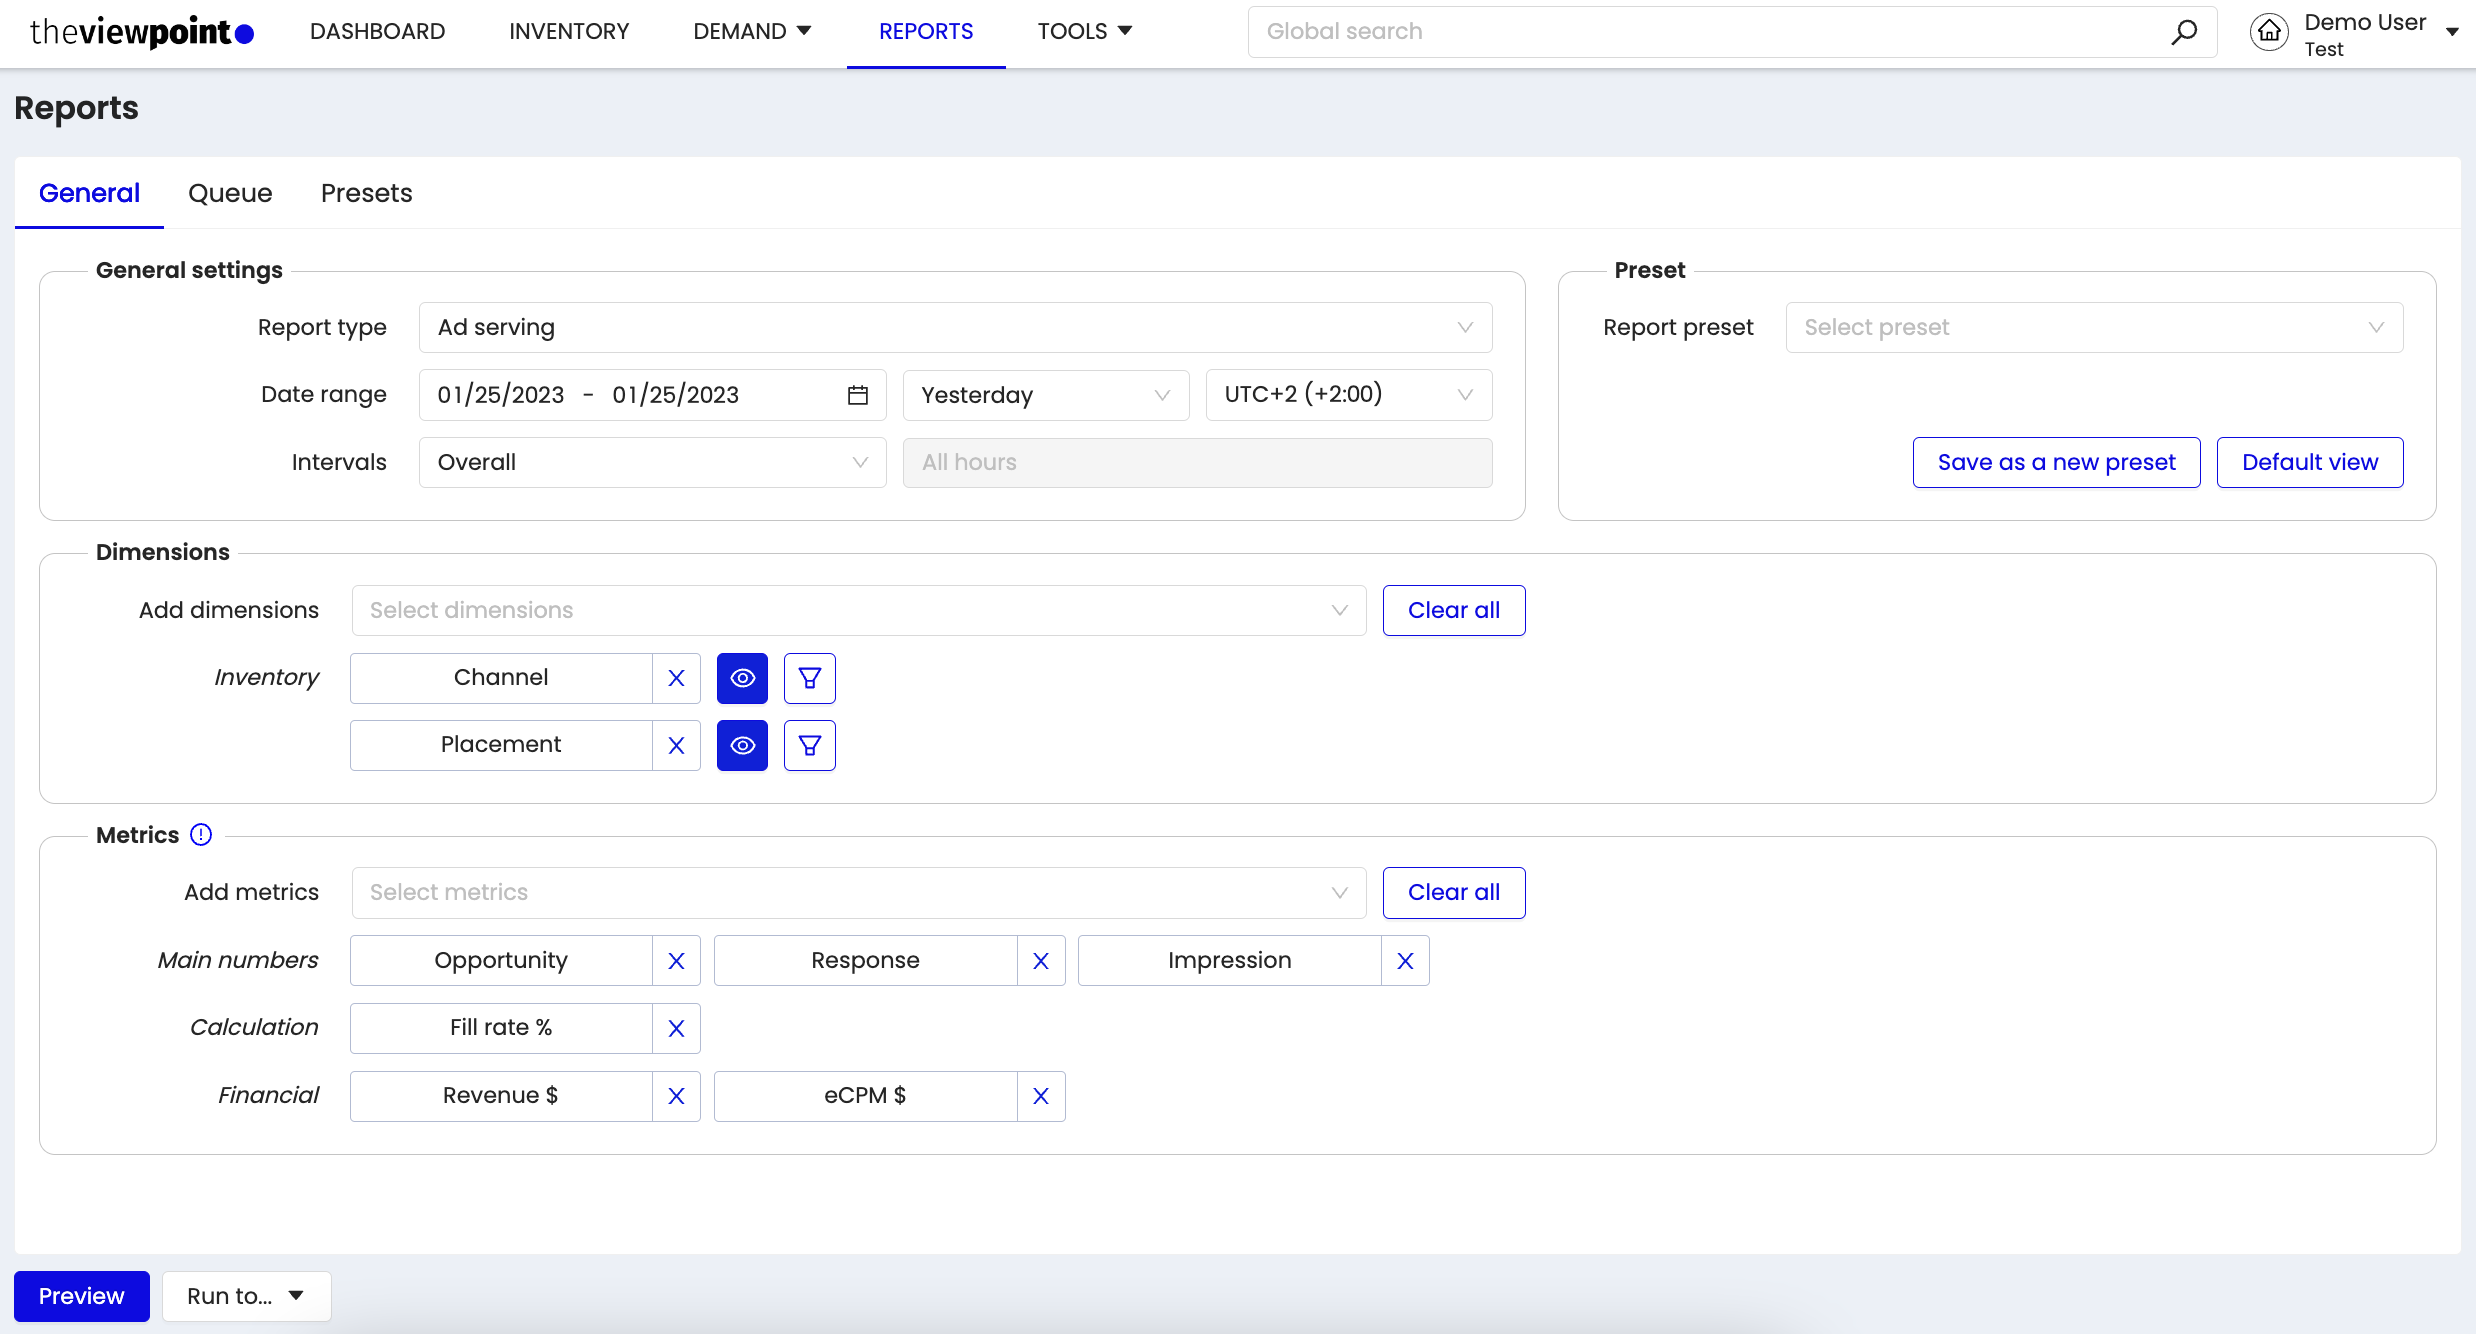
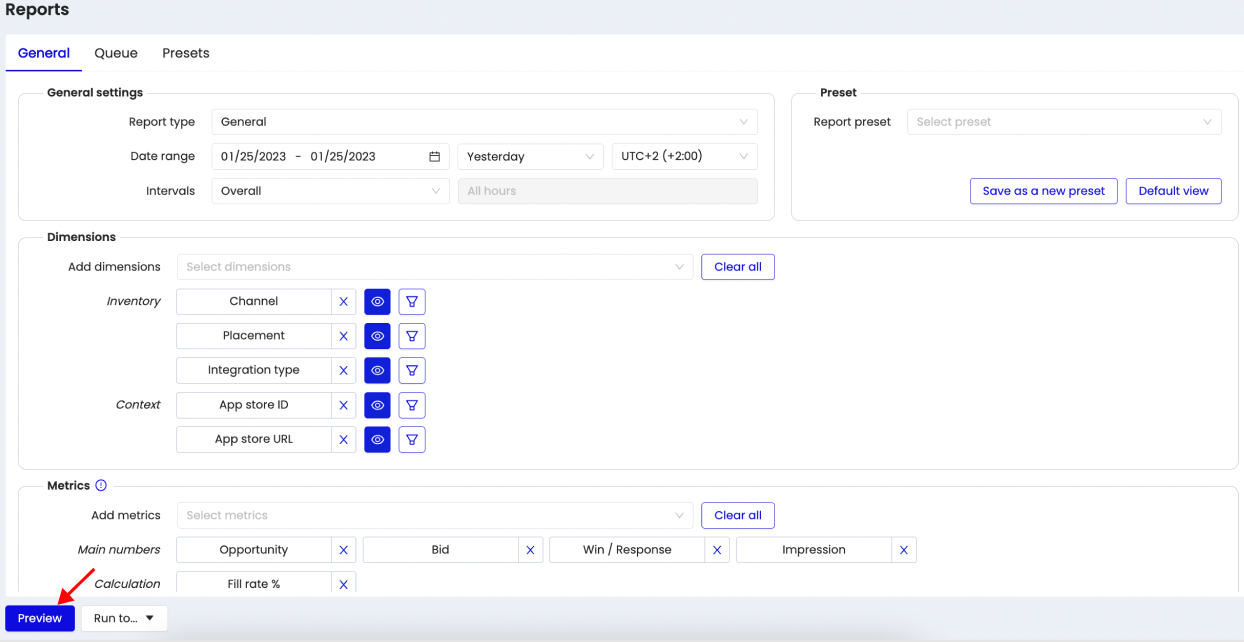
Report creation
To create a report, you need to do the following:
Select the type of report
Available report types:
General - a pre-set list of dimensions, metrics, and filters that are needed to get a report on the inventory’s and campaigns’ performance in the system;
Price rule - a pre-set list of dimensions, metrics, and filters that are required to receive a report on the Price rule operation;
Block rules - a pre-set list of dimensions, metrics, and filters that are needed to get a report on the Block rule operation.
Select Report Date Range
Use a date picker and choose the start date and end date for generating the report.
Select Report Interval & Timezone
Select an interval within which the information will be displayed in the report.
Select a Timezone in line with which the report will be generated.
Select the required dimensions
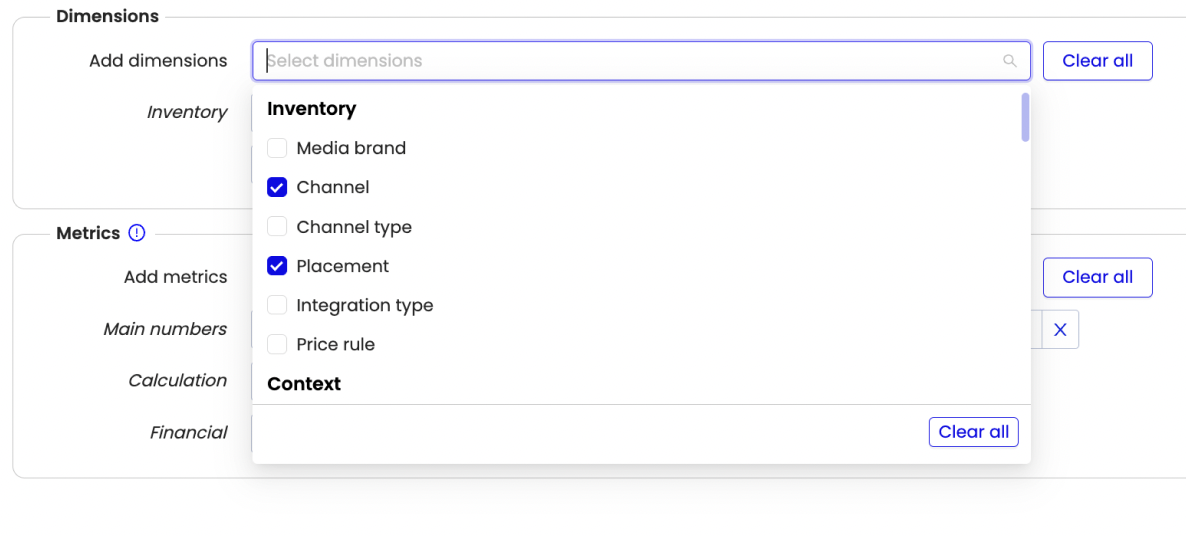
List of all available Dimensions - Dimensions & Filters
Select the required metrics
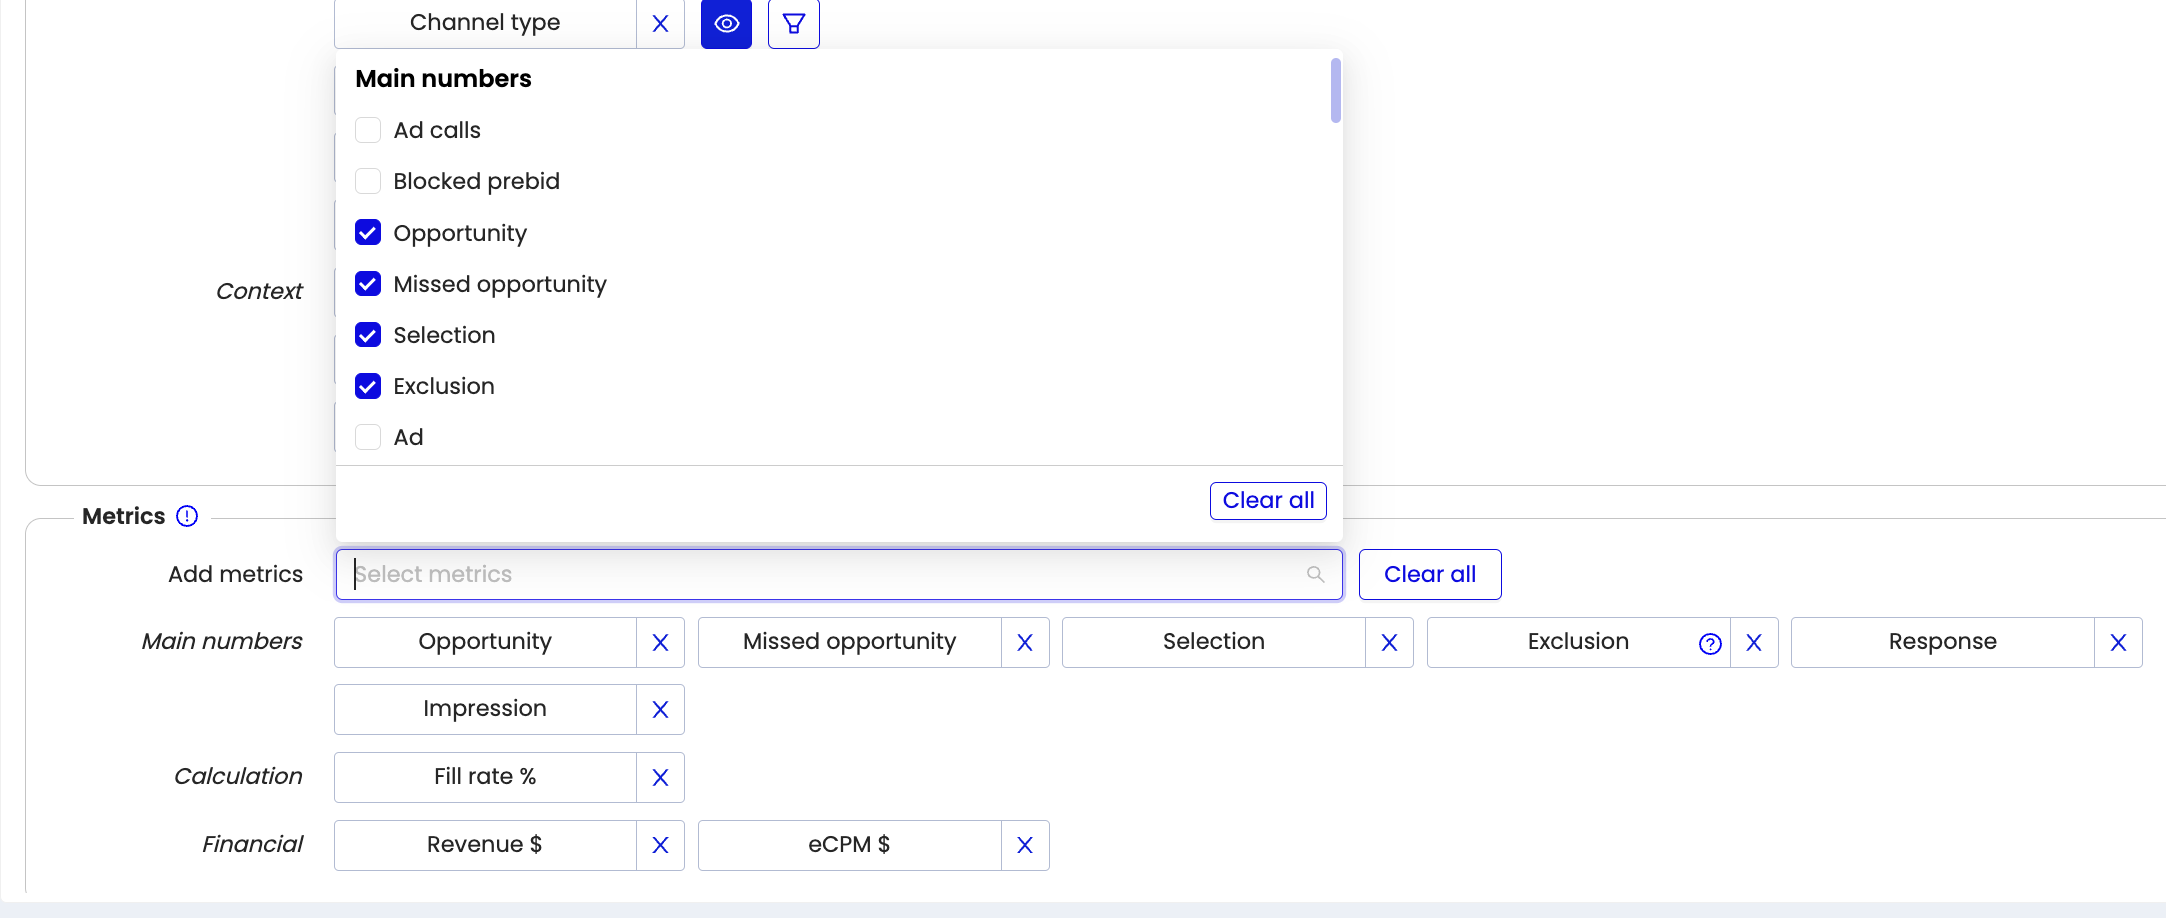
List of all available Metrics - Metrics
Filters in reports of all types have Include/Exclude options.
The Contains option was added to the drop-down list in all the filters, where it was needed.
Partial match gives users the ability to find all entities whose name contains their input without selecting the particular entity, but in the entire database when downloading the report.
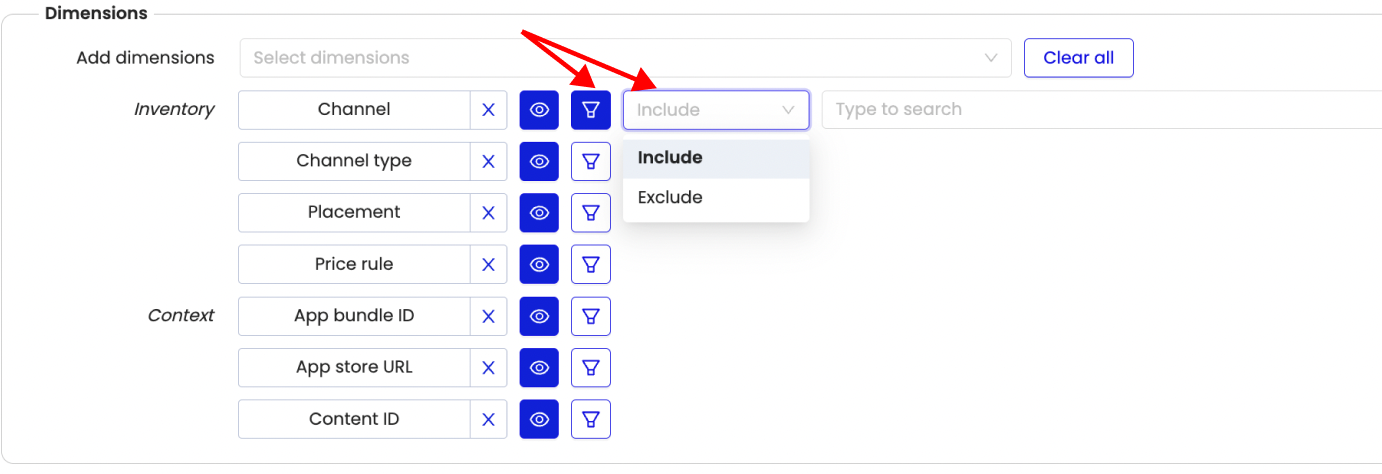
To enter parameter values for the filter, use "Enter" as a separator.
Run report
You can run the report by clicking on the Preview button.
While the browser tab is open, the report in this tab displays those dimensions / metrics / filters with which the report was last launched.
Exiting a report and re-login (going to another page - for example, campaigns) does not reset the selected metrics/dimensions/filters the next time you go to reports in this tab.
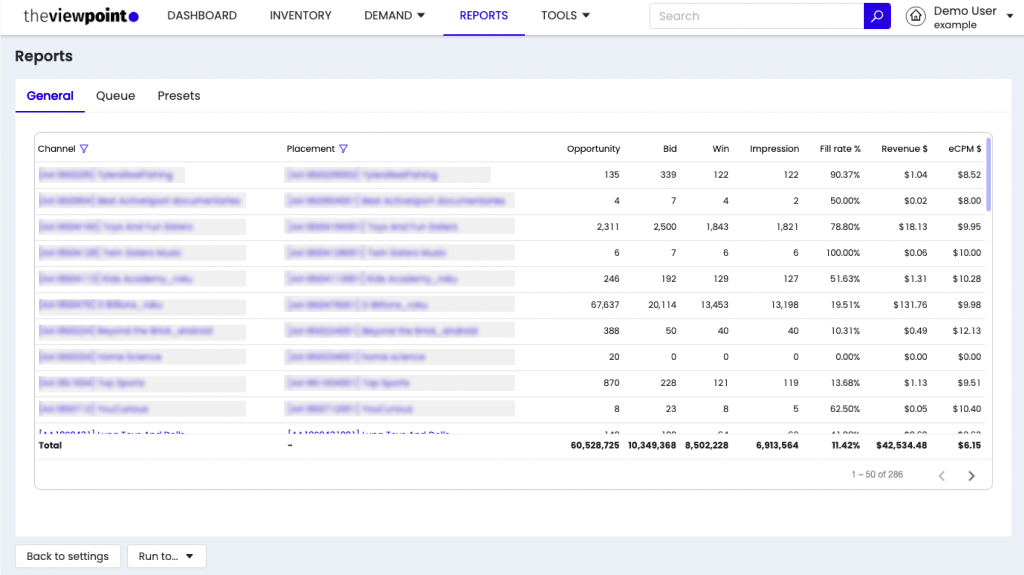
Dimensions/metrics/filters are reset to default by pressing the “Default view“ button.When uploading any type of report to a preview on the platform, the rows are sorted by the 1st metric (from larger to smaller).
If the report is too large, it will be redirected to the Queue and will be available for download after it has been generated.
UI limitation - displayed first 10,000 lines. For the full report please use “Run to...”. The total row displays statistics by the full report.
If you decide to select too many indicators for a report, it will not be able to launch it in the platform interface. Click on “Run to ..” and send the report to the queue or form it in the required format.
The general view of the report output available for viewing in the user interface is shown in the screenshot below:
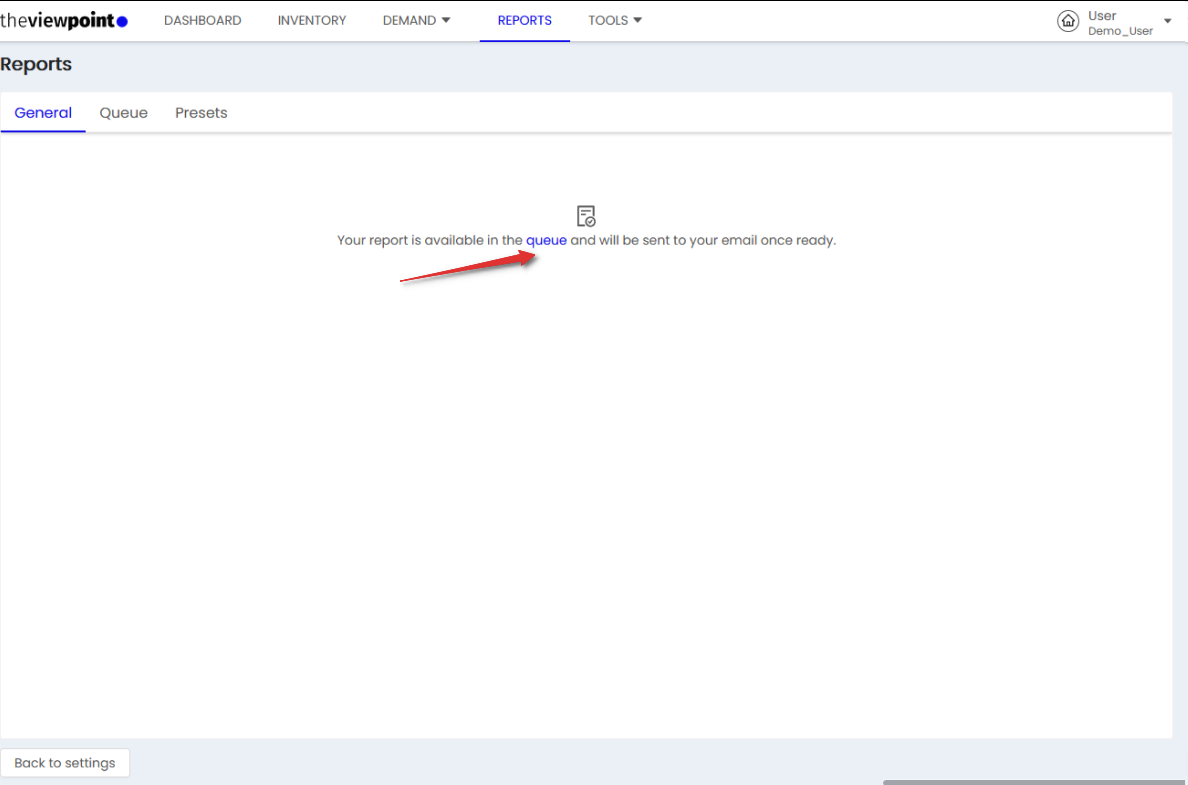
Queue
If you run a very large report, the system will move it to the queue. To access this section switch to the “Queue” tab on the reports page.
If the report was sent to the email via “Run to ..” then you got into the Queue first. It will be sent to your email as soon as it will be prepared.
Normal view of a report queue:
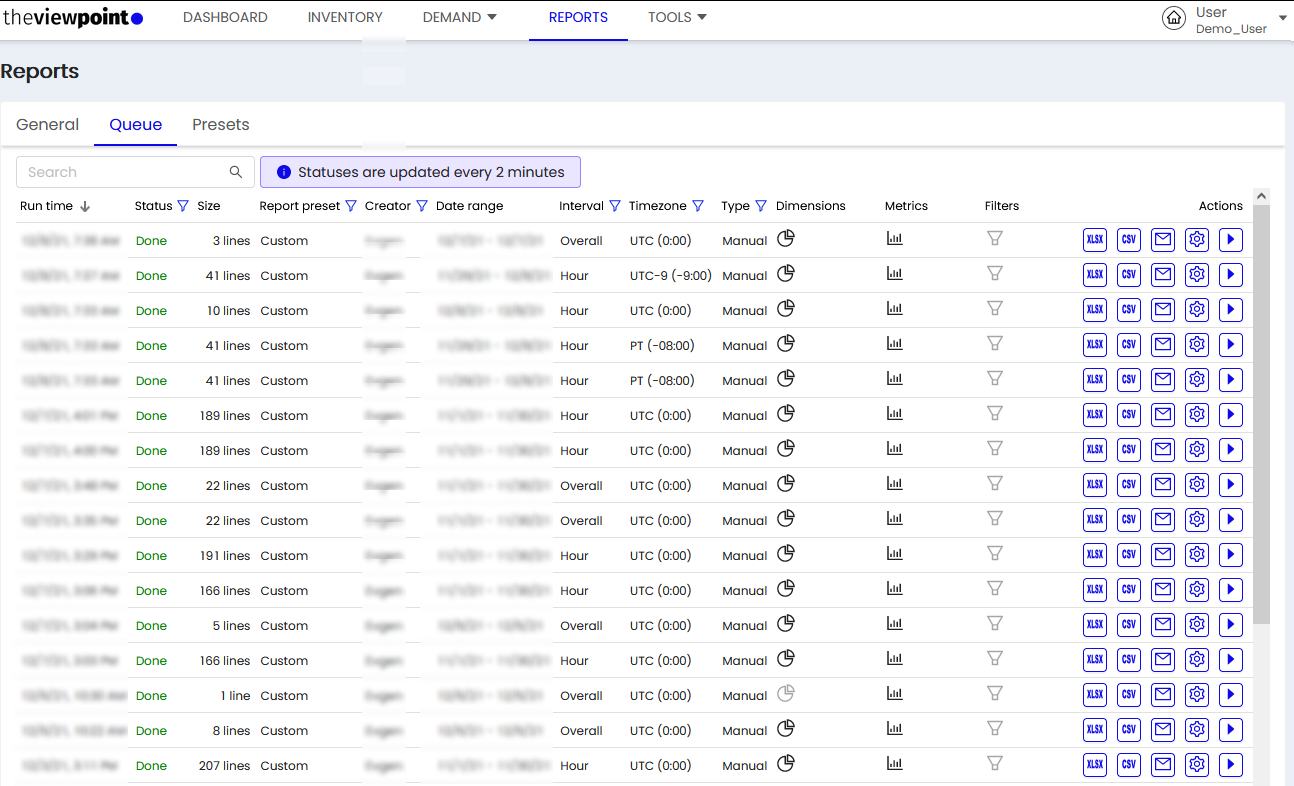
On this tab, a list of reports that moved to the queue is displayed. The table contains the following data:
Column | Description |
|---|---|
Run time | The time when the report is created in the system. |
Status | Status of the report in the queue: Queue - the report in process; Done - the report is generated and you can download it or take another action. Error - error in the report generation. |
Size | The size of the report in the number of lines. |
Report presets | If this report has a saved preset, its name will be displayed in the column. |
Creator | Creator`s User name. |
Date range | Date range for the selected report. |
Interval | Intervals settings for the selected report. |
Timezone | Timezone that is used in the settings of the selected report. |
Type | Report request type. |
Dimensions | A list of Dimensions that are involved in the settings of the selected report. |
Metrics | A list of Metrics that are involved in the settings of the selected report. |
Filters | A list of Filters that are involved in the settings of the selected report. |
Actions | Actions that can be performed with a generated report: XLSX - download the report in XLSX format; CSV - download the report in CSV format; Mail - send this report to your email; Make as a preset - if this report is not preset, when this button is clicked. A preset is created with already selected settings for this report; Edit & run - go to the report creation page, with already selected settings for this report. |
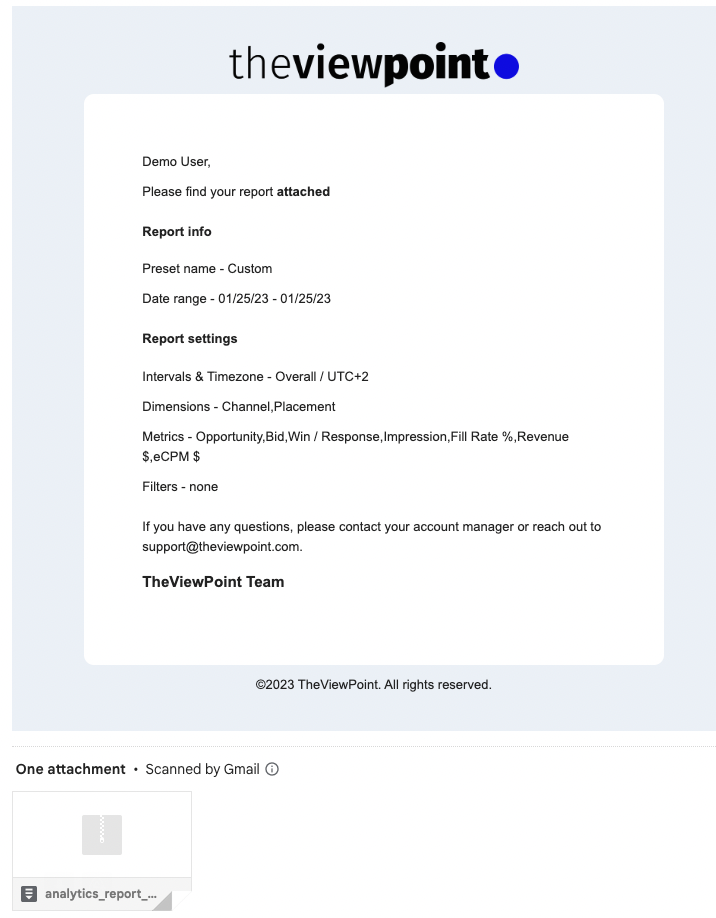
Email report letter
When the report was sent to the email, depending on the size of the report file, it will come either with a direct download link or immediately along with the file itself.
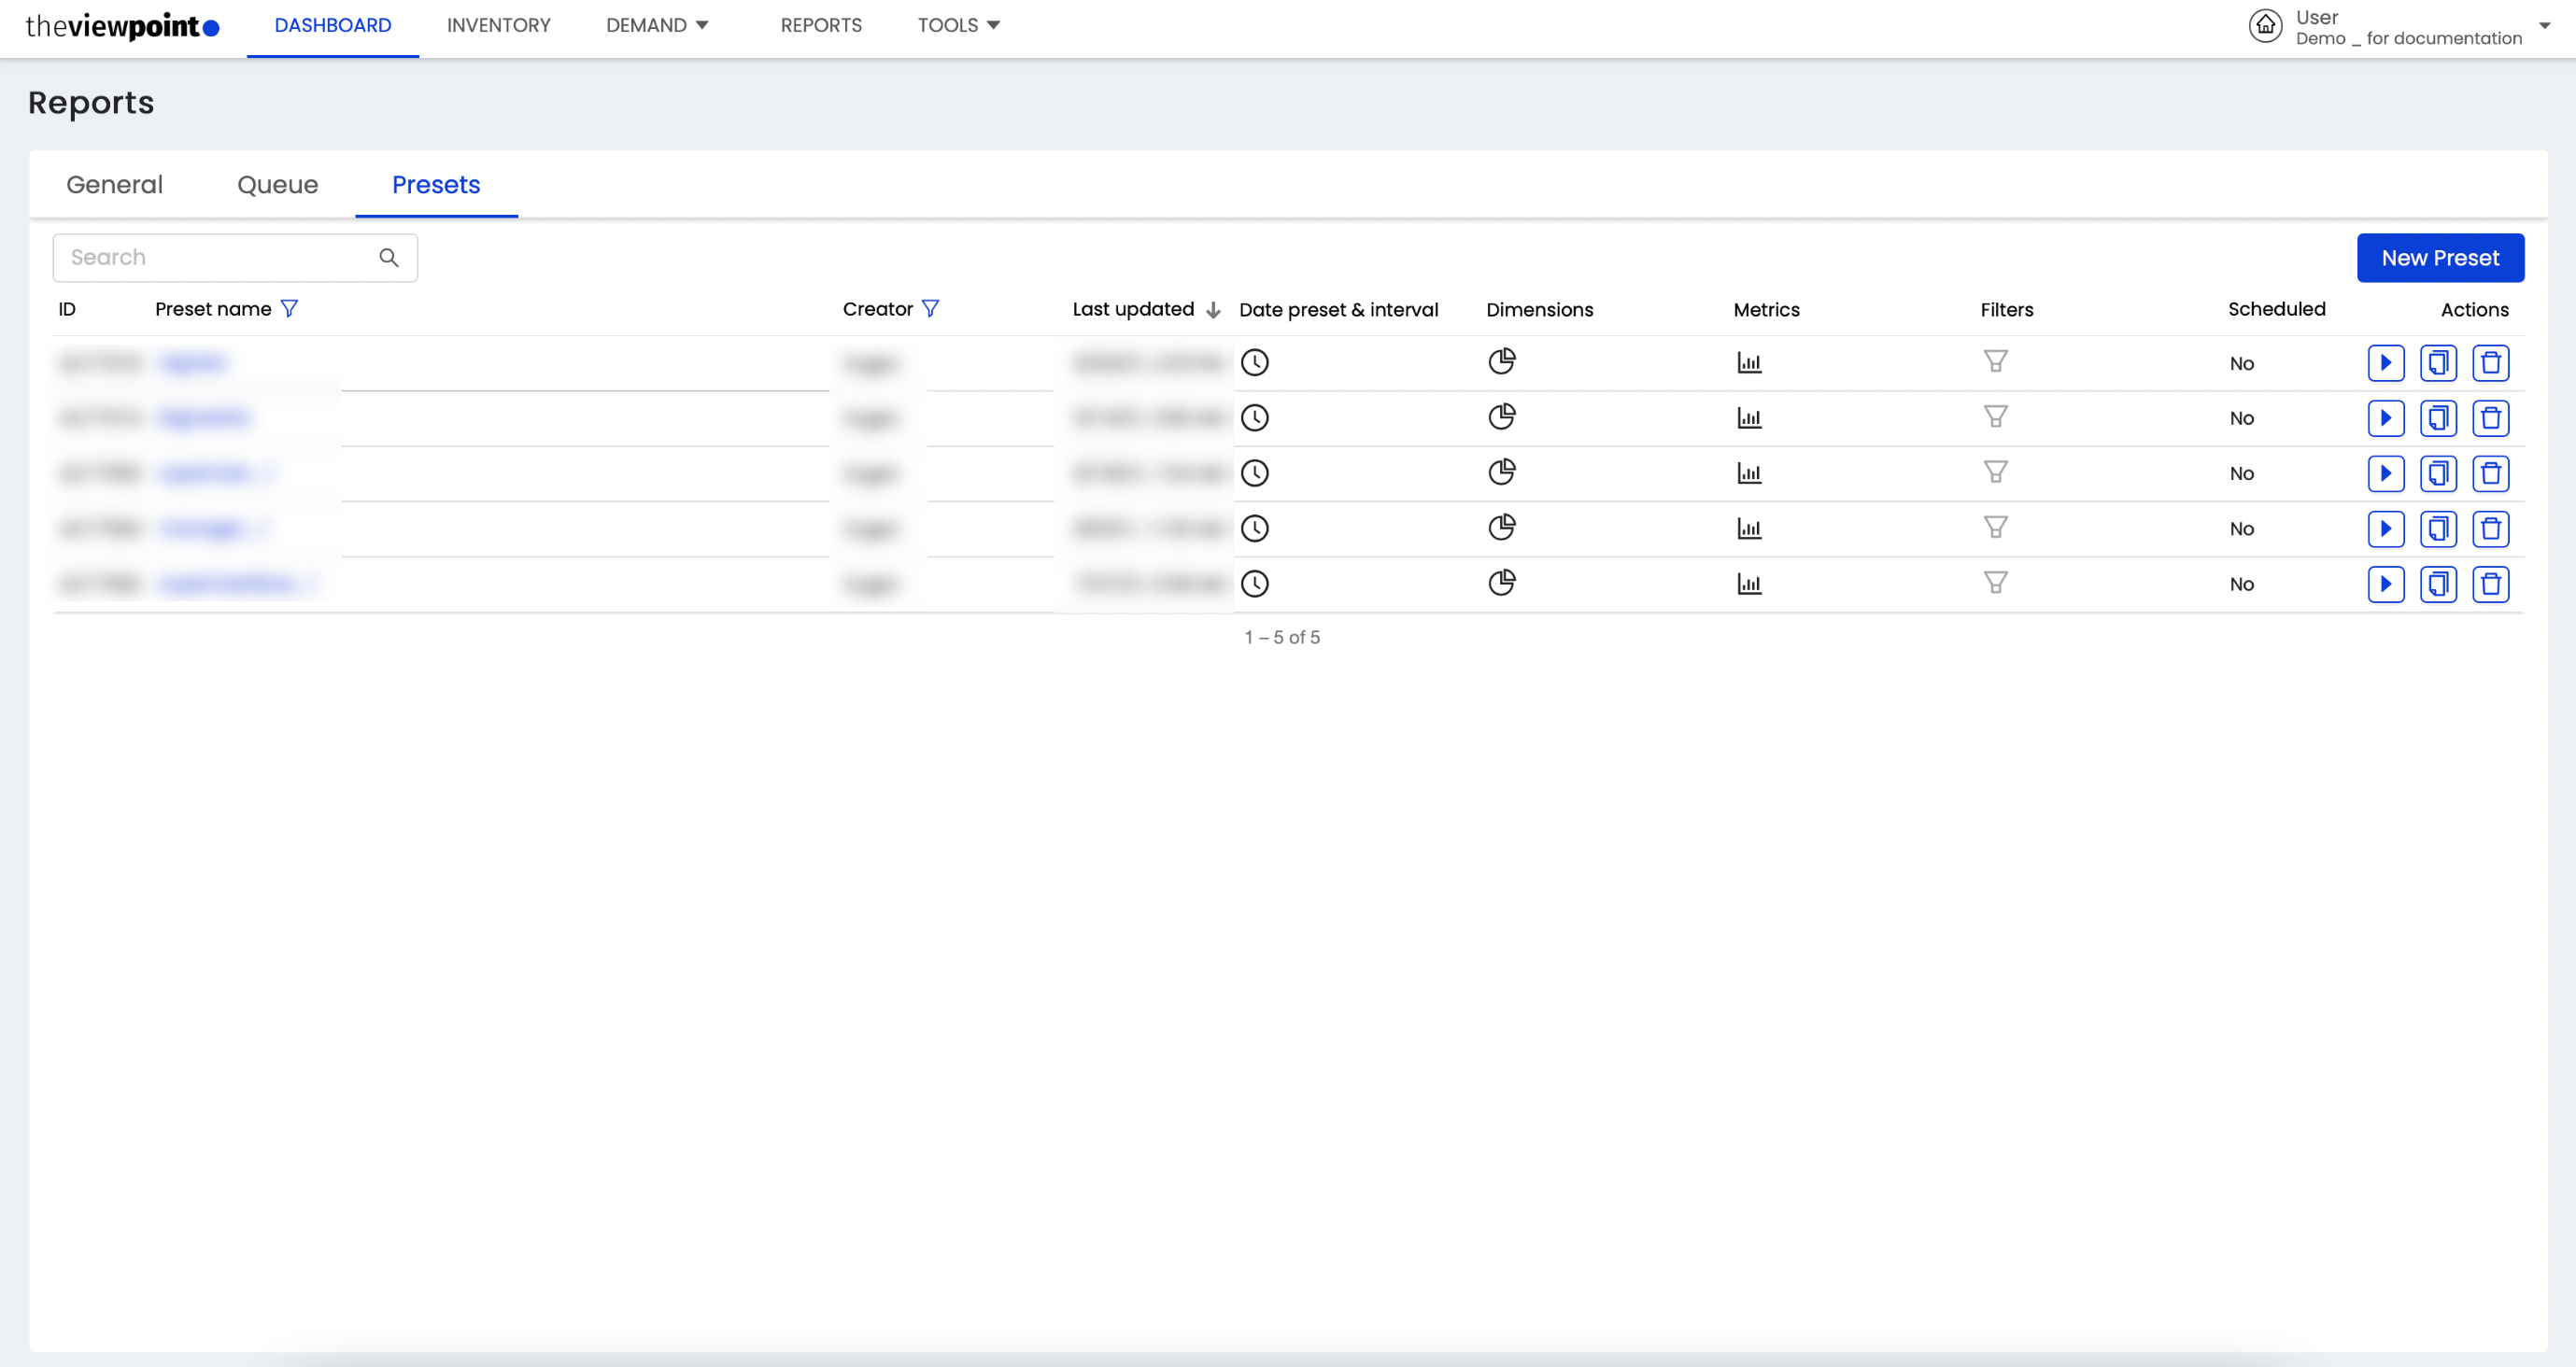
Presets
Click the “Preset” tab in Reports to see a list of report presets that you can run or configure as scheduled reports.
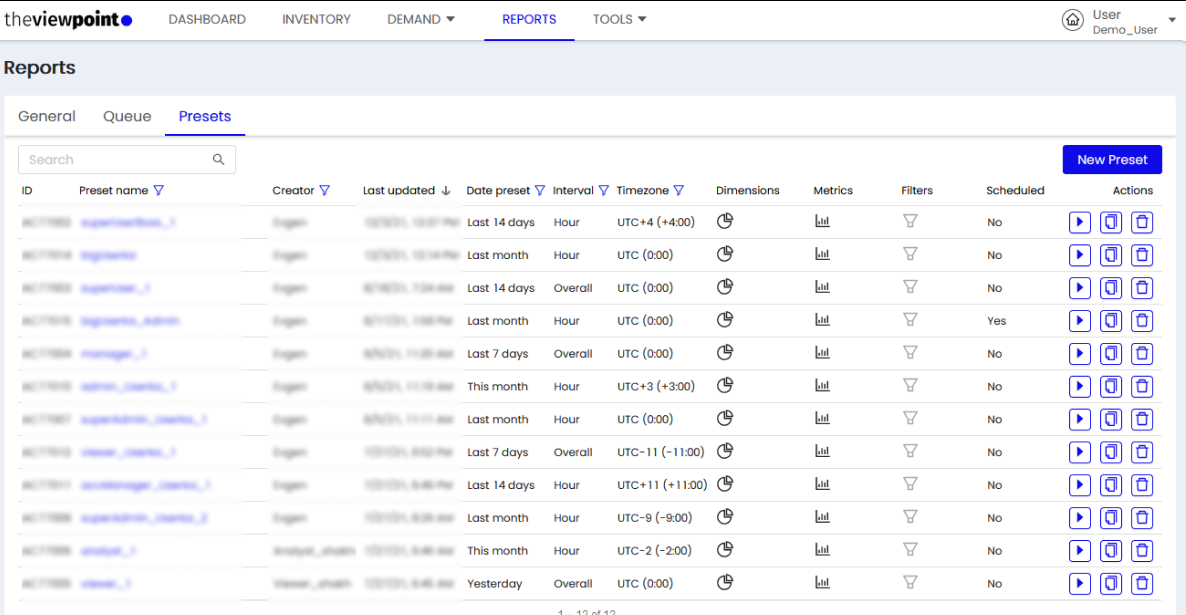
The presettable contains the following data:
Column | Description |
|---|---|
ID | Specific preset ID. |
Presets name | Name of the preset. |
Creator | Creator`s User name. |
Last updated | The time when the last change was applied to the preset. |
Date preset | Date preset settings for the report. |
Interval | Intervals settings for the report. |
Timezone | Timezone that is used in the settings of the report. |
Type | Report request type. |
Dimensions | A list of Dimensions that are involved in the settings of the report. |
Metrics | A list of Metrics that are involved in the settings of the report. |
Filters | A list of Filters that are involved in the settings of the report. |
Scheduled | Whether the function of scheduled reports for this template is enabled. |
Actions | Run - launch a report on the selected settings preset. Copy - create a copy of the selected preset. Delete - delete the selected preset. |
You can view/edit an existing preset by clicking on its name:
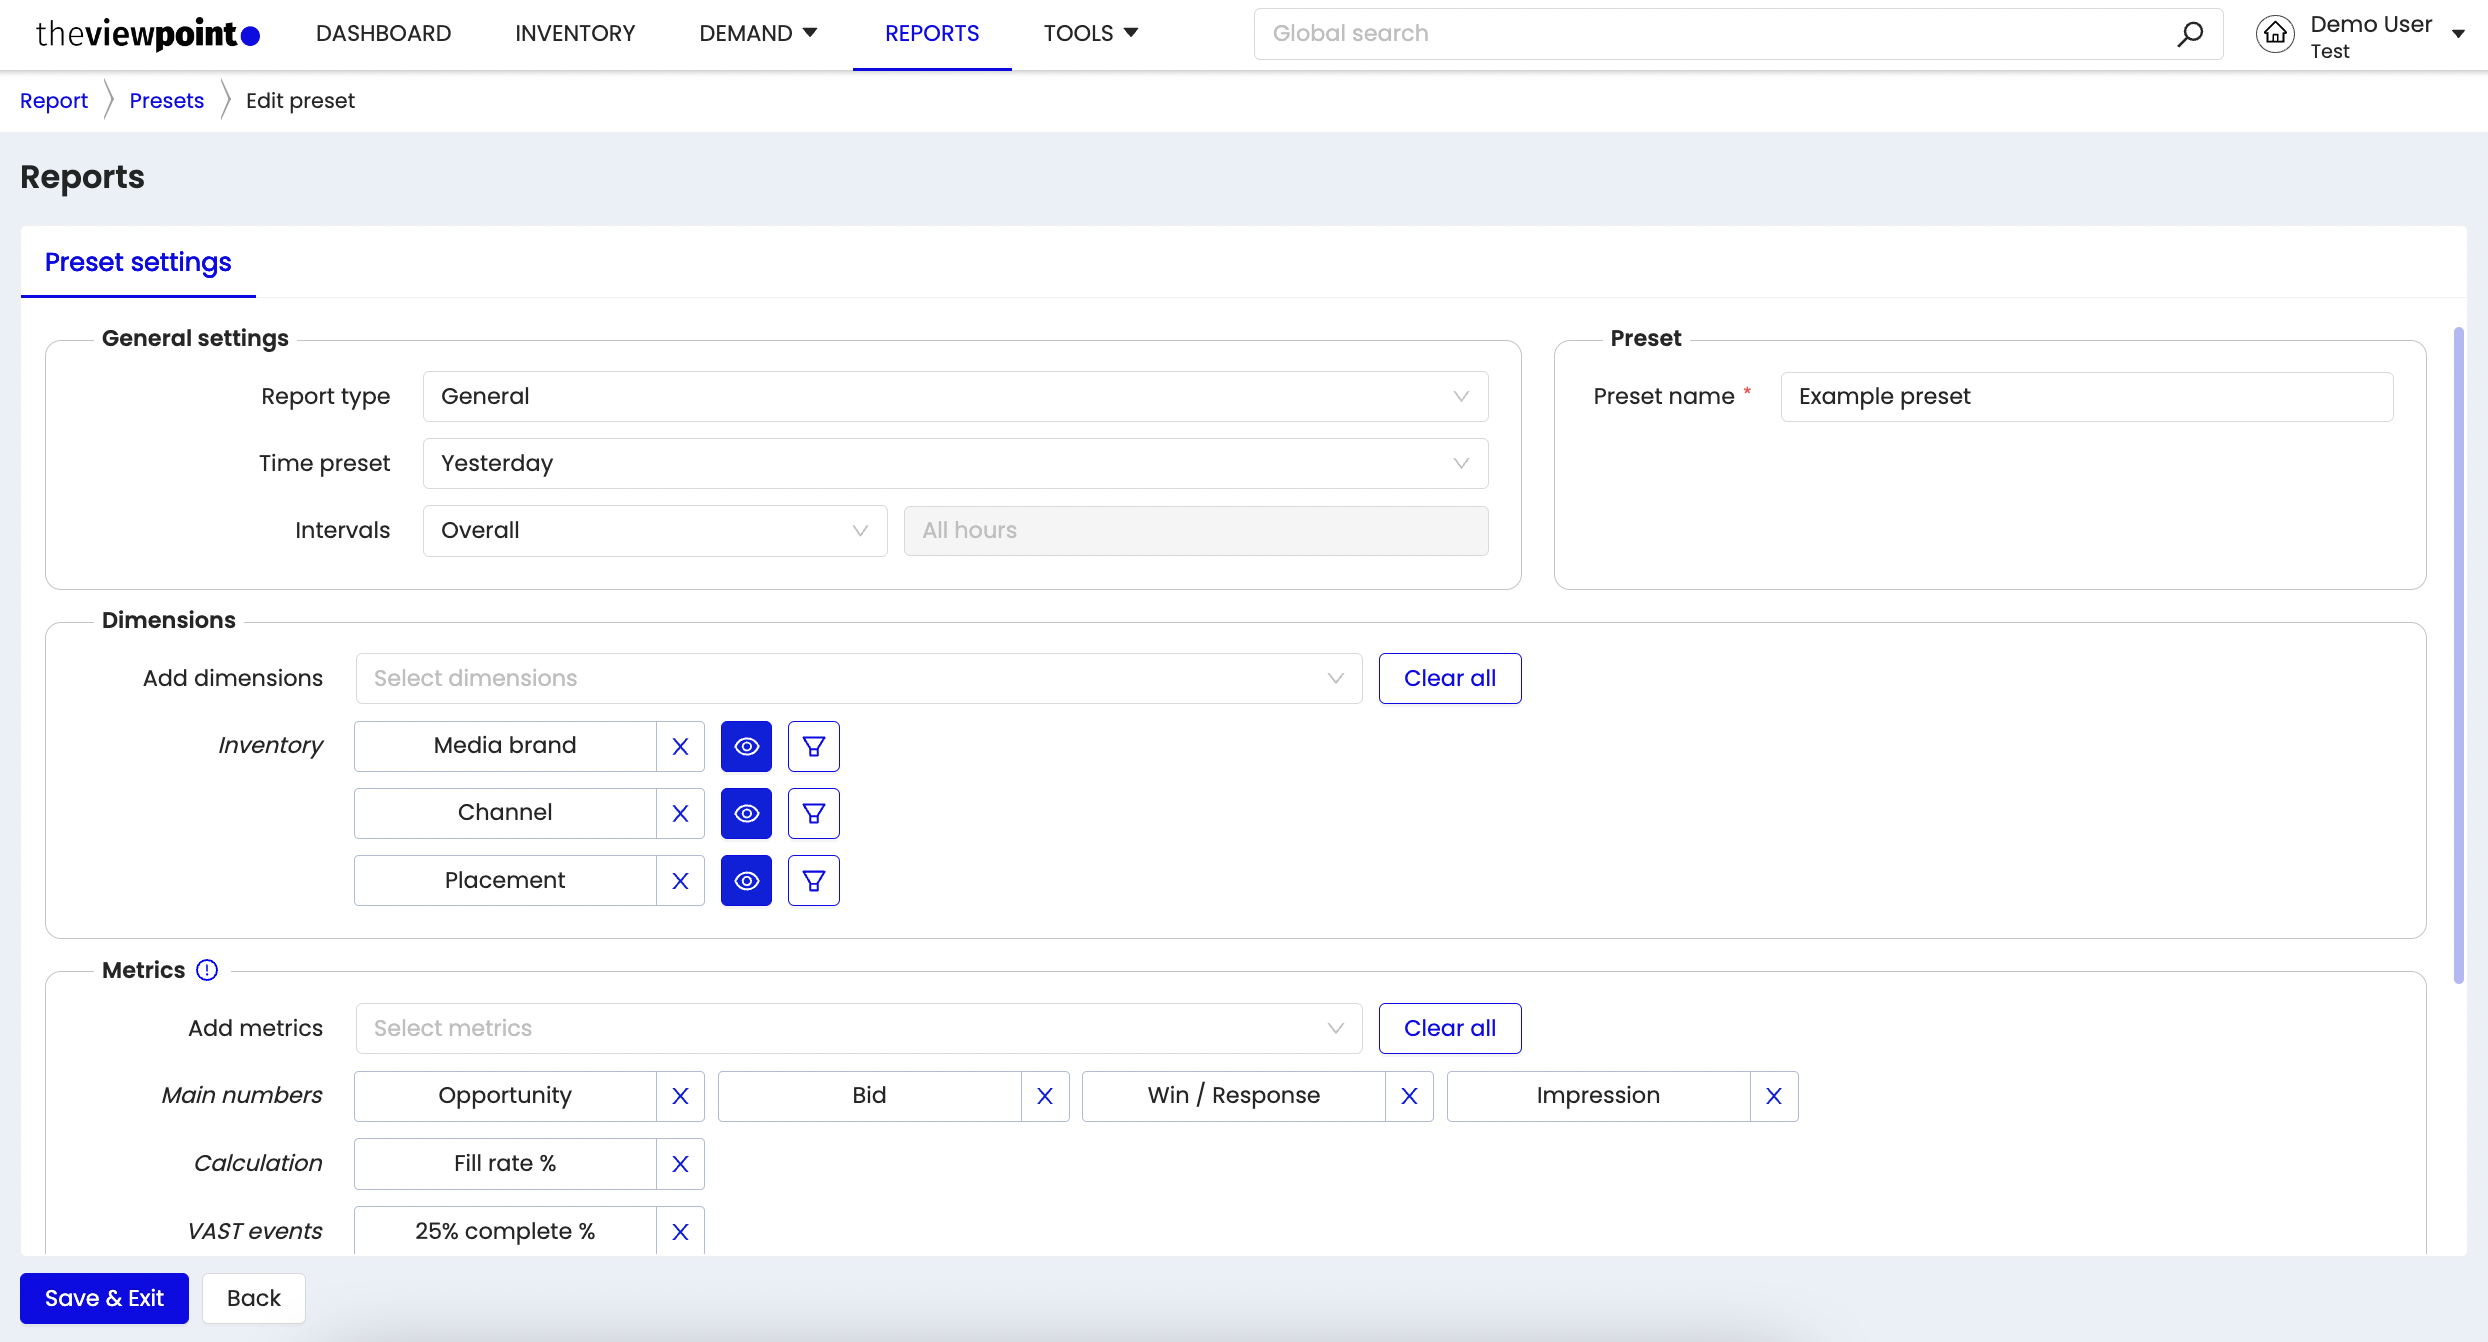
On the preset viewing/editing screen, the name and all other report settings can be changed.
You can run a preset by clicking on the “Edit & run” button.

You can create a preset by clicking on the “New Preset” button
To create a preset, you need to specify its name and report settings. When you save it, it will be added to the list of previously created presets.
Scheduled reports
There is a Scheduling section in the settings of each preset. Using this section, you can set up a regular delivery of the desired report to the selected email addresses.

Recipient - select or specify the email of the user who will receive this report;
Repeat - specify the frequency with which users will receive this report.